
In Part 1 of Your Guide to Knobs, Balls, and Rollers, I introduced you to the wonderful world of “rolling out” – what it is, what it does, equipment, and more! Now we will get into technique!
As a reminder, in Part 1 I said, “If you have a connective tissue disorder, diabetic neuropathy, musculoskeletal injury, moderate to severe pain, swelling, or bruising, or other circulatory, muscular, skeletal, or nerve condition, don’t use a roller or ball on it without approval from a trained health care provider.” I still mean it.
TIMING
How long should you roll out for best results? The research data used by the Self Myofascial Release (SMR) research article, The Effects Of Self-Myofascial Release Using A Foam Roll Or Roller Massager On Joint Range Of Motion, Muscle Recovery, And Performance: A Systematic Review (see Part 1 for more details) shows effective rolling times to be anywhere from 5 seconds to 20 minutes.
Keeping the variability in mind, my advice is that if you are new to SMR, start conservatively. Don’t overwork an area. Don’t make the pressure too intense or focus on a problem area too long. You may end up causing additional pain or discomfort. How long is too long? That will depend on the area and what is causing discomfort. Maybe you can start a SMR practice with pain-free pressure only. Try rolling out a healthy area for no longer than 2 minutes. See how it feels later. Build time and/or intensity slowly.
SIZE AND SHAPE
Generally, big tools work best for big areas and small tools work best for small areas. I have a lot of different sized balls and rollers that work for different purposes, but you can become an expert with just one ball or roller. For years I did fine using only a tennis ball. (They are great for targeting tight areas in the back.) Then I splurged and bought a racket ball, then a nerf-like football, and then a foam cylinder.
I got a little carried away.
The only roller shape that is a little tricky are the “peanut” shaped ones. They look like two balls melted together to form a trough between them. Often used for the neck and back, the space between contact points is fixed and may not fit your body. The novel shape adds expense, as well. Borrow a friend’s peanut to see if it works for you before purchasing your own.
TECHNIQUE
“Rolling” is a misdirection. Using rollers and balls involves movement and stillness. Moving your body across a ball or roller can give you a nice, broad, relaxing massage. Holding still and leaning into, or resting on a ball or roller, can help you focus pressure on key areas of pain or stiffness.
Generally speaking, rolling on a wall will give you more control but pressure will be lighter. Using your bodyweight on the floor will give you deeper pressure but less control. Be careful not to strain your hands and wrists while propping yourself on the floor.
NECK AND BACK
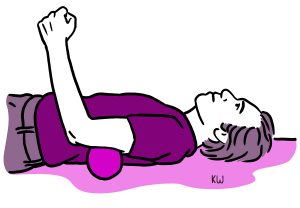
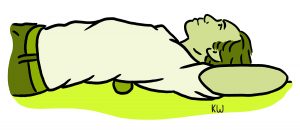
Rolling on the floor, you may want to hold your hands behind your head to keep you neck supported. Long hair has a way of getting pulled under the roller. Tie it out of the way.
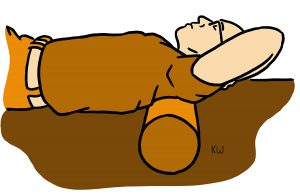
Use a roller to loosen the upper back and neck. You can also rest back into the roller to stretch out the chest.
Use a ball to target specific muscles along the spine, the shoulders, or buttocks. A larger 6-inch Styrofoam ball is my favorite way to work into the muscles on the side of the neck.
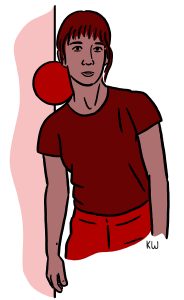
CHEST
If you have neck pain, stretching and loosening the muscles of the chest is a must! Leaning into a ball against a wall to target the upper chest muscles at the collarbone and shoulder will help loosen your neck and shoulders, control pressure, and avoid hurting breast tissue.

FOREARM AND WRIST
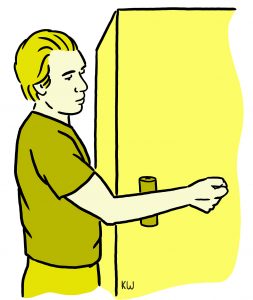
To access the muscles on the front and back of the forearm, stand on one side of a projecting corner where two walls meet. Use a small roller on the wall that you are facing to roll out the back of your forearm.
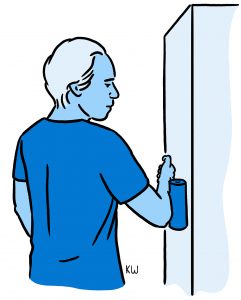
Then use the roller on the wall moving away from you to roll out the front of your forearm.
HANDS
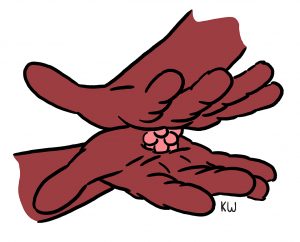
Buy a two-pack of the Ethical Pet Atomic Rubber Bouncing Ball Cat Toy balls. Sandwich one of these little knobby balls between your palms a roll it around. Delish! Give the other ball to your cat or they will be jealous. This is the only knobbed ball I use and it is fantastic on those cranky finger tendons that run across your palm.
EVERYWHERE ELSE
The rolling techniques and body areas listed here in Part 2 are selected because they concentrate on your most essential anatomy (other than your mind and soul) for creating comics. But don’t worry, someone somewhere has figured out how to roll out practically every body part known to human-kind. You can find all sorts of instructions online for rolling out legs and feet. Just remember that some sites with brilliant rolling demonstrations make exaggerated or inaccurate claims as to the mechanisms and benefits of Self Myofascial Release. Browse with a critical eye.


Comments are closed.